My first app with Mobincube
Some people have great ideas to build an app, so they try Mobincube. Mobincube offers a huge flexibility and a great functionality so that they can create compelling apps. But, let’s face it… because of that flexibility some users find it a bit difficult to start creating their first app with Mobincube, so they get stuck as soon as they reach the app edition section of our website. They need some learning before finding out that Mobincube is a really powerful tool.
We are trying always to make it easier to the user, so we promise that we will ease the first step as well. In the meantime, here you have some recommendations so that creating your first app doesn’t make you crazy.
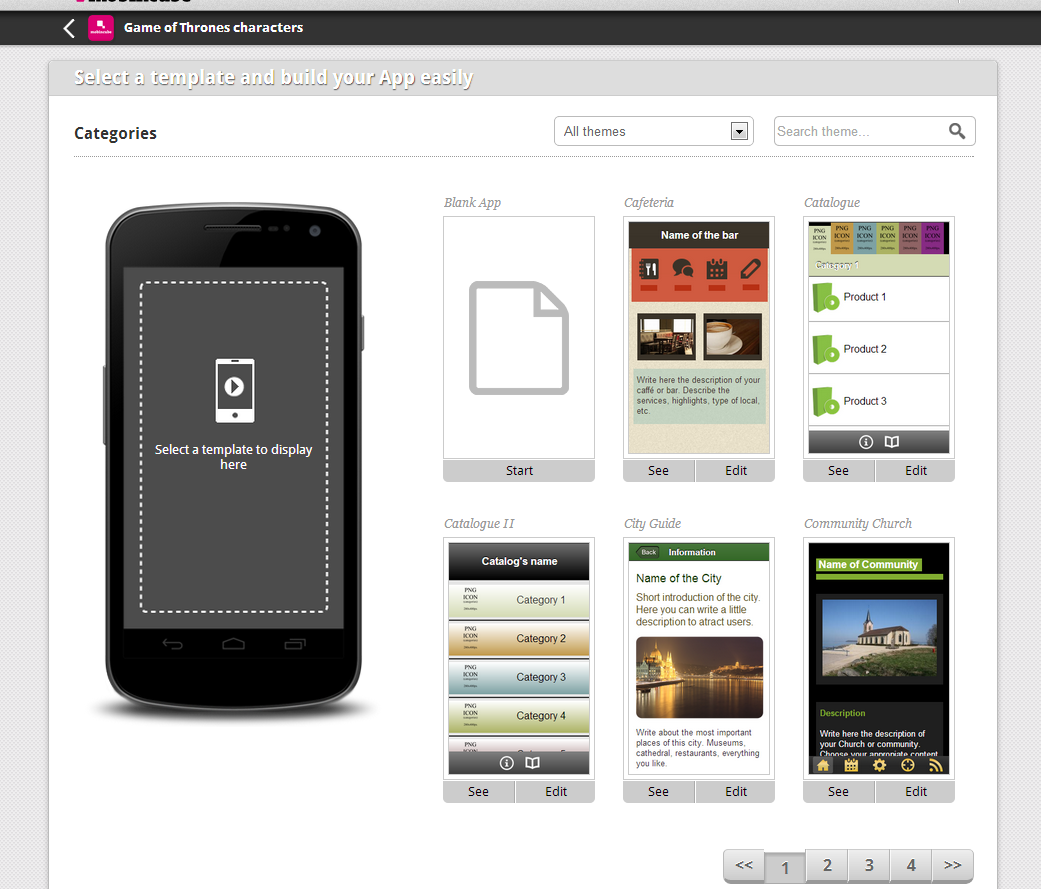
Start from scratch or use a template
With Mobincube you can totally decide the structure of your app. Once you become an expert user, you will prefer to start your apps from zero. But if you are a newbie, we recommend to use a template, so that you can have a better understanding of how things are done with Mobincube. After you select a template, you can modify everything on it, so don’t worry if you don’t find a template that fits your needs, just use a similar one just to check how it was created.
How to start editing your app
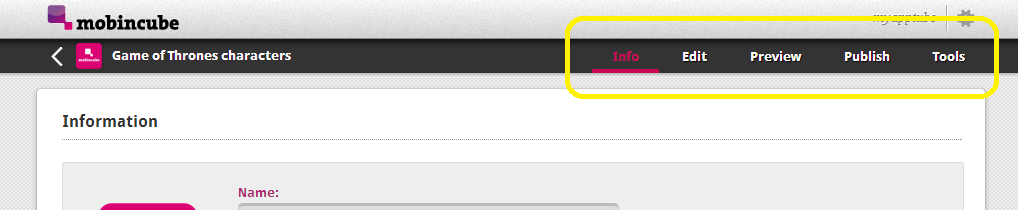
On the top of the screen there is an horizontal menu. From that menu you can easily access to different sections of Mobincube:
- Info. Here you enter some information about your app (name, icon, description, etc.)
- Edit. Here you can edit your app: content, structure, design, etc.
- Preview. Once you have editted your app or part of it, you can preview it directly in your device or using an emulator.
- Publish. Once you’re done with your app, you can publish it so that people can download it.
- Tools. From here you can access some tools to empower your app (cms, monetization, push notifications, etc.)
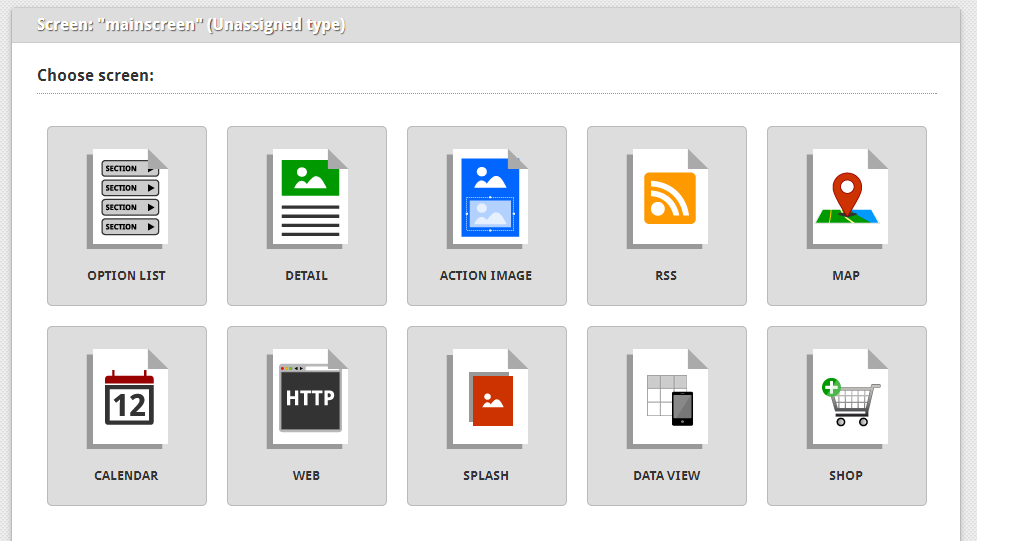
Mobincube apps are composed of screens
Mastering Mobincube is easier if you understand this: an app is a set of screens that are linked to each other. So, for creating an app with Mobincube, you have to create several screens and set connections among them. There are different types of screens, depending of your needs: menus, multicontent, forms, multimedia, maps, rss readers, embedded websites, database viewer, etc.
How to start adding screens to your app
If you start your app from zero, the first thing you have to do is selecting the type of your first screen. This will be the first screen that will be shown in your app. Most apps start with a menu (list of options screen) or a logo screen (splash screen). But you can start your app with any other type of screen:
Anytime you can add new screens to your app. There are basically two ways to do so:
- When setting the action related to an element in some screen, you can select the action “Go to screen”. As a parameter of that action you can wether select an existing screen or select “New screen”, which will create a new screen.
- Click on the “+” button on the top of your tree of screens.
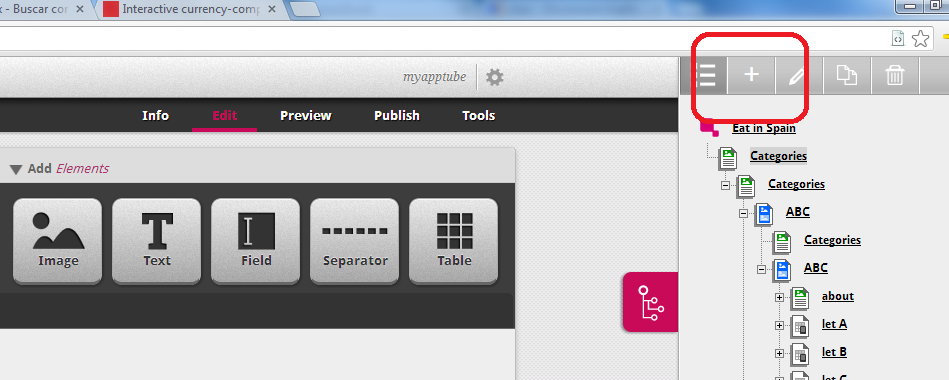
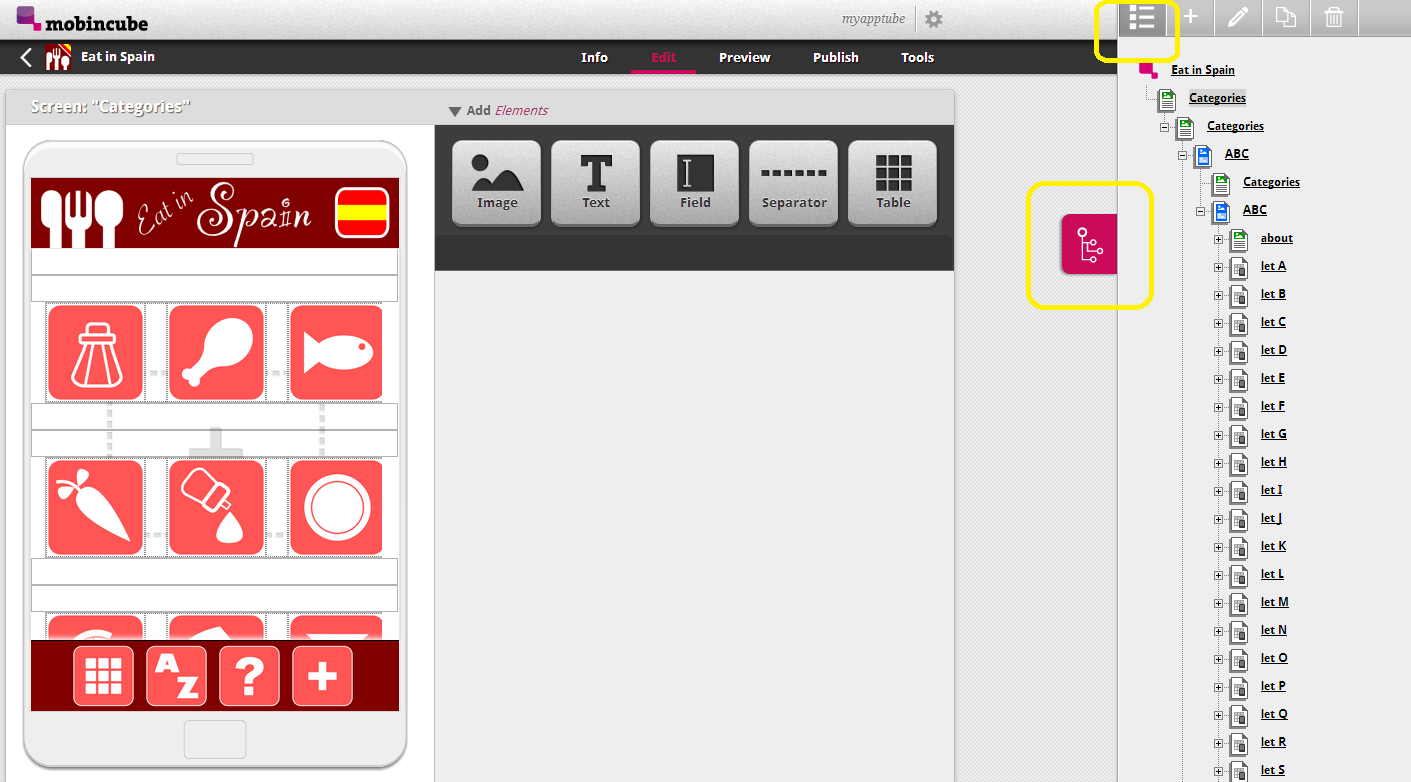
How to select which screen to edit
When editing an app, you’ll see sin tabs In the right side of your browser. Click on the tab on the top in order to display the tree of screens. There you can find one screen and double click on it in order to open that screen for edition. If you prefer to get a list of screens instead of a tree, click on the first icon on the top of the tree.